


Configuring the Westell 2100, 2200 or 6100 to Disable Routing
These instructions will tell you how to convert a Verizon supplied Westell 2100, 2200or 6100 modem/router to disable the router and convert this device to a "dumb" modem. Having a separate router usually works better and it lets you pick he type of router you are using. There are small variations between different models of these Westell Modem/Routers, but the procedures should be similar.
Alternately, you can configure the unit to act as your router. We have some separate instructions on that subject, but the way you access the internal menu of tbe modem/rouer will be the same.
Is this unit a Modem or a Modem/Router?
Here are the most common box styles for the Westell Modem Routers and modems.
The original Westell Wirespeed
This is the best and most reliable modem only unit. It has no router, no settings, and no software.

This is a modem only. If you have this unit you don't need to do anything.
Westell 2100 / 2200 / b90
There are several Westell models with this body style. This unit usually has a router built in. It does not usually do Wifi, and the routing capability really isn't very useful without wifi. You can use it this way, but we recommend disabling the router and buying a separate Wifi router.
The easiest way to verify that this is a router unit is to check the back and see if there is a reset button. If there is, then it's a router.
Most units of this type have a router built in.
Westell 6100
This unit comes in both router and non-router versions.

These units usually have a route capabilityr, but we have some Westell 6100 modems that are modem only. They look like the picture of the Westell 6100 above but they say "Bridge" on the silver label on the back. "Bridge" means no router.
A plain modem has nothing to reset because there are no settings. There's a diagram below that shows where the reset button should be.
If you are not sure, just try to follow the instructions and see what happens. Westell modems are sturdy and nothing we suggest here can break them.
Cabling
For configuration purposes, you need to connect your computer directly to the 2100/6100 using an ethernet cable.
Notice the "reset" button found on routers. If you hold this and count to 20 you can reset the modem. On some models this is a hole where you can poke a paperclip, but it's the same idea. If there is no hole and no button, this may not be a router. Simple modems have nothing to reset.
The telephone cord goes from the wall to the modem. This is labeleed "DSL In" above.
Connect your computer via ethernet cable to the port labelled "LAN RJ45".
The USB cord can be ignored.
Note: if there is no "reset" button, your modem may be a plain modem with no router. Read on.
Modem Lights
Before you try to get online, it is vital that you have a live DSL signal on your line.
If the Westell 2100/6100 unit detects a DSL signal, the READY light will go SOLID GREEN. This may take a minute or two so be patient.
If the ready light is blinking, then you do not have a signal and the line will not work.
If you do not have a DSL signal, then check the telephone cable at both ends, make sure everything is plugged in securely, and turn the modem off and on. Wait a minute or two, and if you still don't have a signal, then you need to contact us to file a trouble ticket.
Note: the Ethernet light may blink on these units instead of going solid like the basic modem. As long as it is green, blinking is fine. But the ready light must be solid green.
If you do have a solid ready light, then go to the next step and start configuration.
Connecting to the Westell 2100/6100
We want to get onto an IP address that is the same subnet as the modem.
- Right-click on My Network Places and select Properties
- Right-click on your LAN connection and select Properties
- Double click on "Internet Protocol (TCP/IP)"
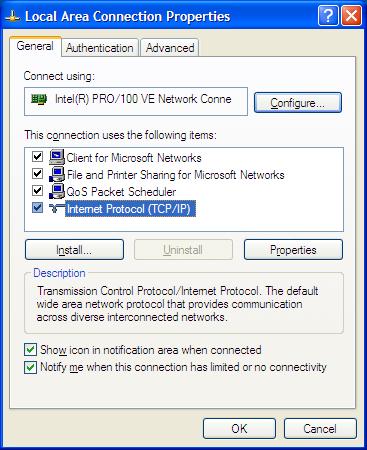
When you click properties, this window will come up. Set the IP address, subnet, and gateway as shown in the picture. Setting this static address should work, however, it may also be possible to just put "obtain and address automatically". Just be sure that you get an address that starts with 192.168.1. something
Note: if you are on a wireless network at the same time, and have a 192 adress, you may need to turn off wireless networking to avoid address conflicts. I had to do this.
Here's the IP Protocol Properties window:
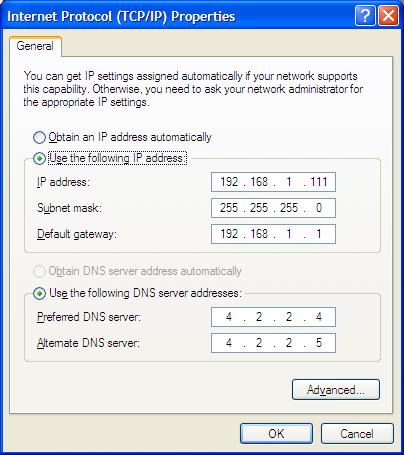
Click on OK and OK again. You should be able to connect to the modem now.
If you are configuring the modem as a router, there are separate instructions for that, which you should refer to. These instructions will disable the router.
Reset the Modem
Hint: If you are not sure how the modem is set up, or the passwords don't work, you may need to reset the modem to factory default settings. This is pretty easy. Just find the reset button on the back. Then, press it for twenty secnds. The modem will reset. Give it a minute or two to restart, and your modem should be back to defaults. This should not be necessary for new modems but if you have a used modem a reset may be helpful. As a sound ecological and green move, we support the use of used modems.
Configuring the Modem for Bridge Mode
Open up a browser and go to http://192.168.1.1/
(on some units it's http://192.168.1.254)
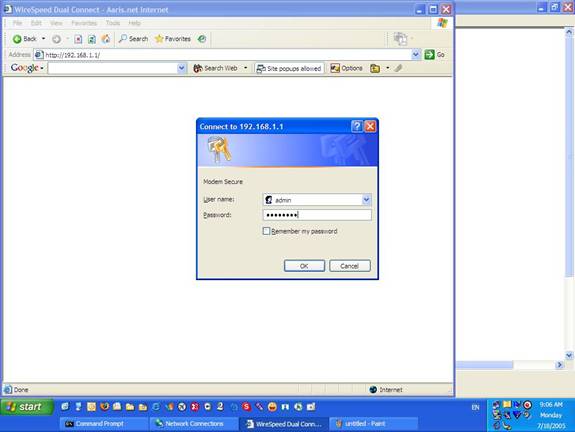
The default user name is: admin
The default password is: password
Enter those and click OK.
You will then be directed to a page to assign your own Administration Name (aka user name) and passwordfor the modem/router.
I don't know if there is much point in doing this since the only one you are likely to keep out is yourself. If you do set a new password, be sure to write it down and attach it to the router so you have it when you need it.
If you do reset the password (some models insist on it) then we suggest to the the username to admin and the password to admin. That kepps things simple and it will match these instructions in case you forget.
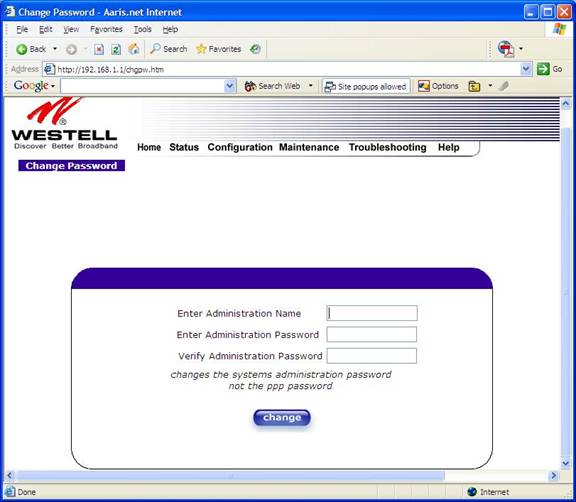
Enter your new Administration Name and Password and click on "change" and click on OK when prompted.
You will be automatically directed to the home page of the modem/router:
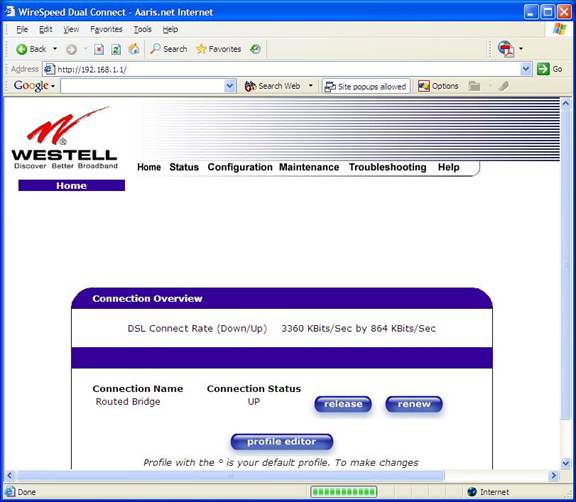
(You will be prompted for the NEW user name and password the very next time click on any kind of link for the modem.)
Ideally at this point, you would use the "release" button to release the IP address of the modem/route. In Verizon land, this function does not work. It doesn't hurt to try it but don't be surprised if the Westell automatically renew the IP address for you!
Next, click on Configuration and select Private LAN Connection:
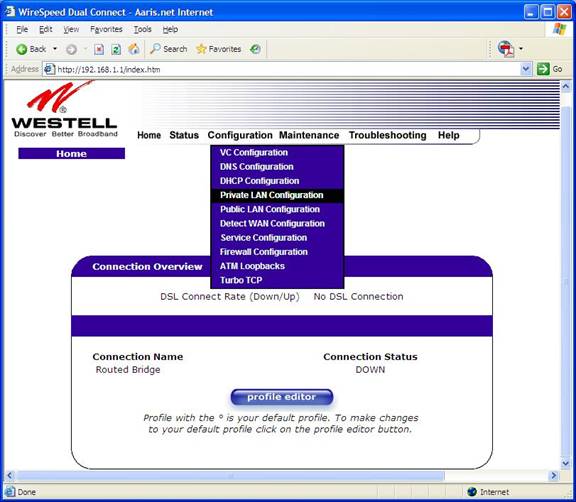
You'll get the following page.
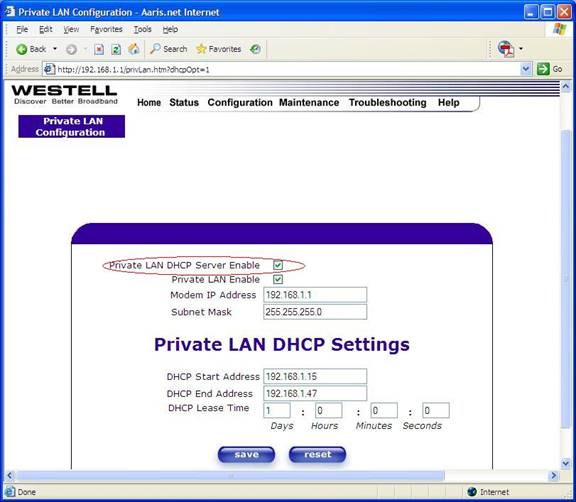
Uncheck "Private LAN DHCP Server Enable" The page should automatically refresh to:
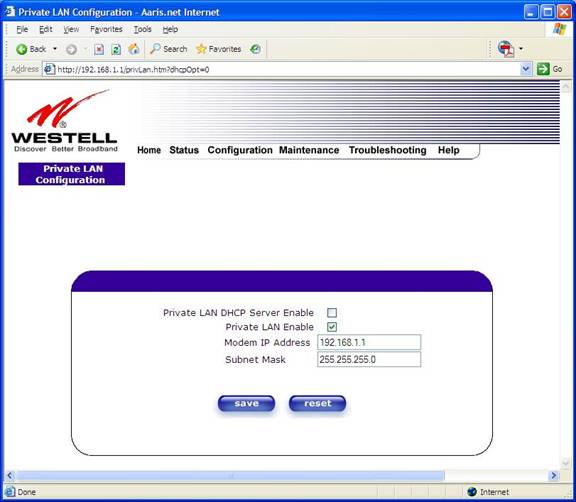
Click on "save".
Next, click on "Configuration" and select "VC Configuration".
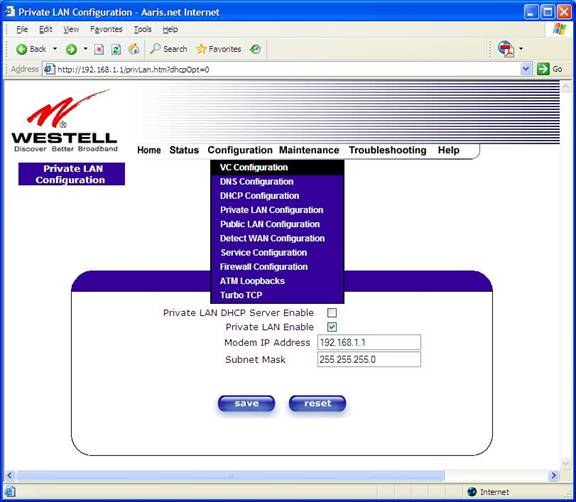
The following page will display:

Click the "edit" button of whichever VPI/VCI is "enabled". In this case, it is 0/35 (Verizon).
The following will pop up:

Click on the "Mode". Right now it says "Routed bridge". That's not what we want. Click on the drop-down menu and select "Bridge":
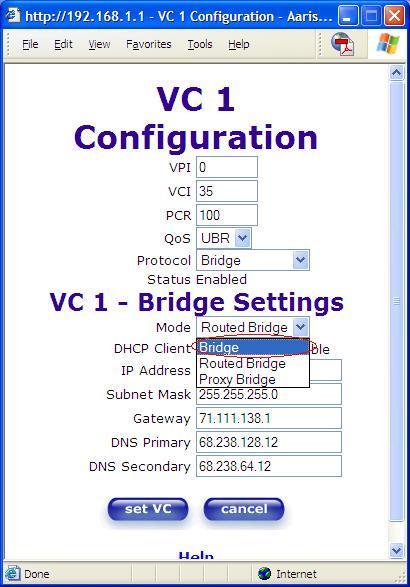
The pop-up will automatically refresh and should look like:

Click on "set VC" and click "OK" when prompted to reset the modem. Ideally at this point, if the 6100 hasn't released the IP already it would do so at this point. It may or may not do so, but your own computer should work anyway.
Once the modem comes back up, you're in Bridge Mode!
You have now disabled the router in the modem. You can now either connect directly with a computer, or set up a router of your own.
Alternate Menus
Some devices have a slightly different procedure to disable the router. If you have logged into the router, and can't match the menus to what is described above, then try these:
Westell 6100 Procedure: Click on Broadband DSL Line from the top menu. Click on Configure Connection from the right menu. Select "Bridged Ethernet" from the Protocol pull down. Click on Save and restart the connection at the bottom.
Westell 2100 or 2200 Procedure: Click on Expert Mode from the menu and confirm that you want to enter Expert Mode. Click on Configure from the menu and then Connection in the sub-menu. Select "Bridged Ethernet" from the Protocol pull down. Click on Save and restart the connection at the bottom.
Here's an example of a Bellsouth Modem with an alternate menu:
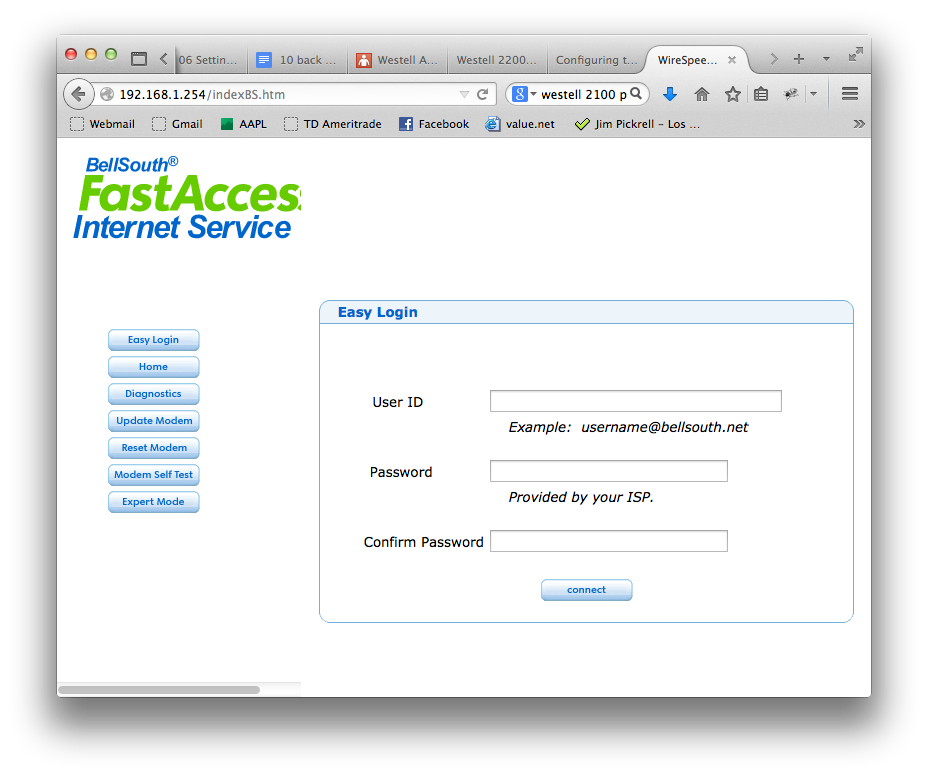
You can ignore the username and password that it's asking for. They are for PPPOE. Instead, select "Expert Mode". The modem will ask us if we are sure. Yes, we are sure. Then the "Expert Mode" menu will come up.
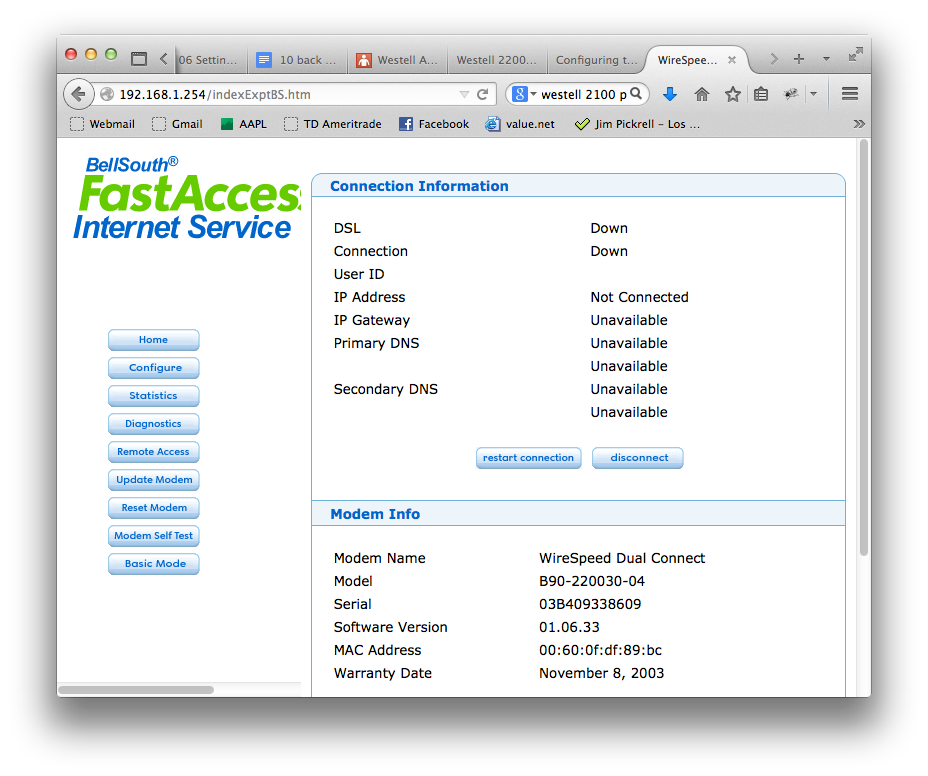
From the menu at left, select "Configure" and "Connection". Then on the right side, change "PPPOE" to "BRIDGED". This disables the router.
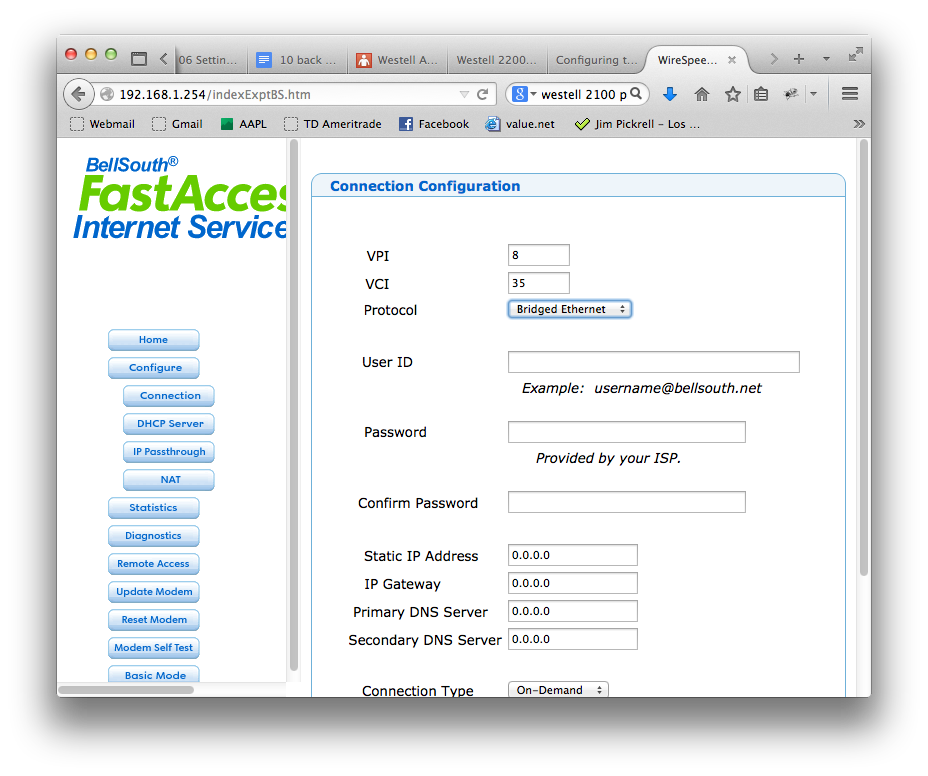
VPI/VCI set to 0/35
There is also a place to set the VPI/VCI. These are currently set to 8/35 on this unit which came from Bell South. The values in Verizon territory should be 0/35. Be sure to set these values correctly, if you don't, your modem will not work.
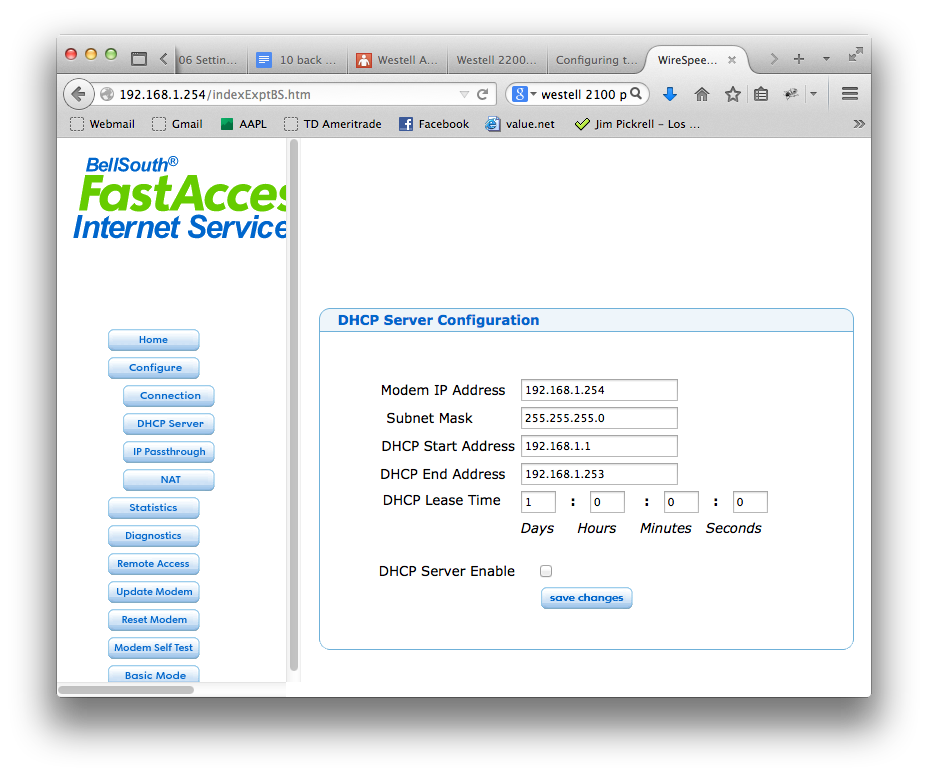
Turn DHCP Server Off
We should also disable the dhcp server, because it will be confusing if we have more than one router giving out ip addresses in the same range of 192.168.*.*. Best to just turn this off. This will disable the menus, but that's fine.
Reset the Modem
Now select save and reset. You should see the "Reset" screen.
If you don't see the Reset screen, go back to the "Connection" submenu and do "Save and Restart" from there.
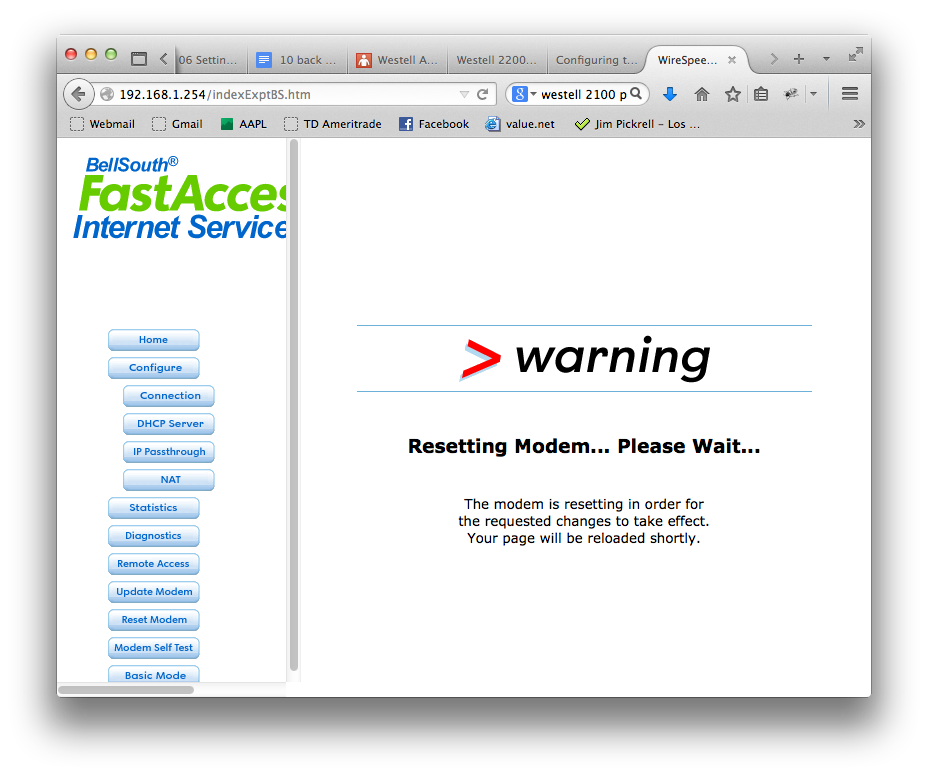
The modem promises that it will be back as soon as the reset completes, but in fact it may not. That's because the configuration page depends on you having the router capability turned on, and we turned it off.
The modem I am working with is stil accessible, but it says it is in bridged mode. The next step is to test it. Then I reset it and I could not connect any more. This is fine.
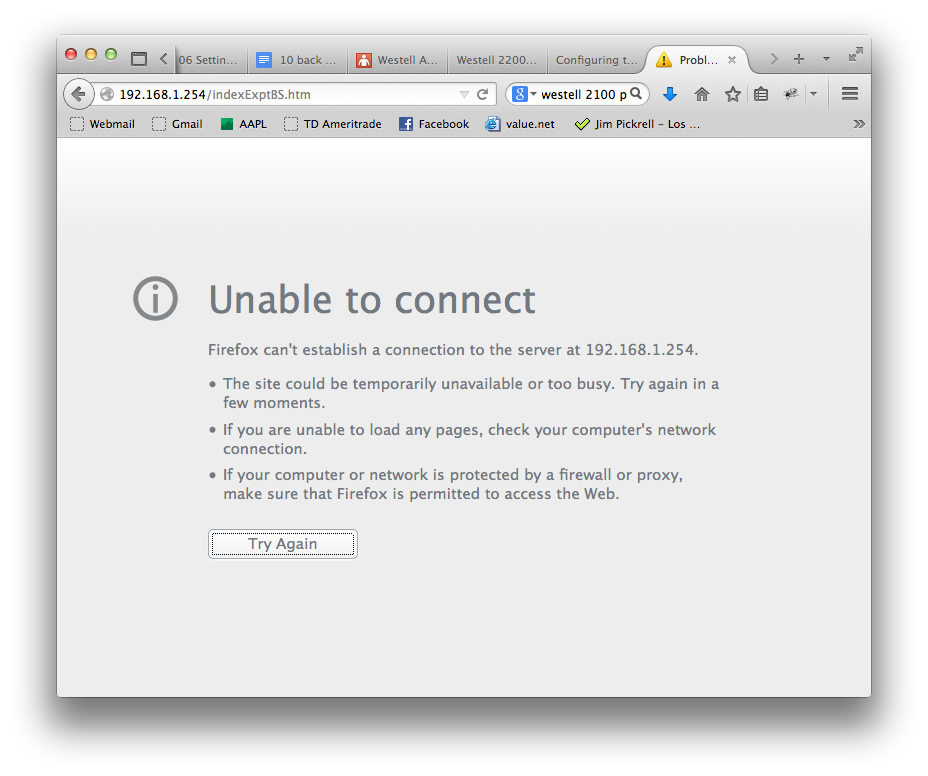
This is absolutel ok. A modem that is a pure modem, you can't reach the menu any more. This is totally ok. The modem is ready to use.
If you want to put the modem back to the original mode and turn the dhcp and the menus and pppoe back on, use the factory reset button on the back. Hold for 20 seconds and everything will be erased and you are back to start.
Wait about two minutes, and then refresh the web page.
Your plain modem is ready to use.
Configure the Computer or Router to Connect
You should now be able to set your computer or router to connect through this modem. It will no longer be a router.
If you have a PPPOE connection, then you will need to turn on PPPOE in your computer and program in your username and password.
If you have a DHCP connection, then you will need to turn on DHCP in your computer and there is no username or password. Go back to the previous step that shows the window for Internet Protocol TCP/IP Properties, and set your computer to "Obtain an IP Address Automatically". Close the windows and you should be online
If you have a router that you want to use to share your connection, you are ready to get started on that process. Refer to the instructions on our website for the individual router that you are trying to set up. Everything should be the same as if you are using a regular simple modem with no router built in.
If you have trouble give us a call at 310 395 5500 and we will be happy to help.
Configuring the Westell as a Router
We generally don't like to set things up this way. We prefer a separate router and modem. However, there are times when it makes sense to use one unit for both, so we'll include the instructions.
The easiest thing to do is to reset the unit to factory defaults. Find the reset button, turn on the modem, press the switch for twenty seconds, then allow the modem/router to restart.
Then repeat the process to access the configuration web page in the router.
First you need to get into the router configuration screens as shown in the top part of this document.
As described above, connect to the router via your web browser at either 192.168.1.1 or 192.168.1.254.
Go through and set up a new profile, with your PPPOE username and password. This is about all you need to do to get online.
We have a separate document on how to set upt the Westell 2200.
Setup of a pppoe connection for the 2100 or 6100 will be basically the same.
.