


DSL Line Quality
In this page we are going to show you how to test your DSL line using a modem. If you are having speed or reliability problems, this can be really useful information.
Every modem or dsl router has a section in the configuraiton pages that show the line quality and speed. We will show you how.
Make sure you have a good dsl signal before you try this. If you don't have a DSL signal there's nothing to measure, and these instructions won't help you. A solid green dsl light on the modem means you have a dsl signal. Blinking or dark is bad.
If the DSL signal is bad, that must be fixed before you can do the tests described here.
Actiontec Modem/Router
If you have an Actiontec, then we will have some separate instructions for you.
Testing DSL Line quality with the Actiontec Modem/Router
Motorola
If you have a Motorola mdoem, read on.
Basic Stategy
We assume you have a modem that has been configured in bridge mode, with the routing capability off.
The instructions below will show you how to log into the device. It may or may not let you do this if it is in bridge mode.
Try it without changing anything first. If that doesn't work, then try resetting the device to factory defaults which wil turn bridge mode off. This will stop your line from working, but it will allow us to check the line. Then we will put the modem back the way it was before, so that your line will work. After you have tested the line you will have to put it back into bridge mode. Instructions for all of this are below
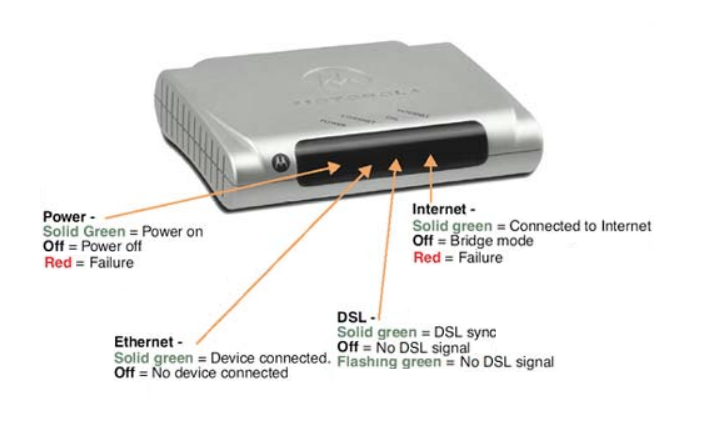
Modem Lights
Before you do anything, check to make sure that the power, ethernet and dsl lights are lit on your modem. The Internet light sould normally be off since your modem should usually be in Bridge mode.
Login to the modem
The device has a little web page in side that we use for configuration. Connect your computer to it with an ethernet cable. You can't do this by WiFi so if you have a new Mac Laptop with no ethernet port, you will need to borrow a computer from a friend, or get a USB to ethernet adapter.
Turn off the WiFi on your computer. We don't want the WiFi on because the computer will be confused about what it is connected to. We only want to talk to the modem.
Now restart your computer, which will reset the ethernet connection. You should now be connected to the Motorola device.
Open your favorite web browser such as Safari, Chrome or Firefox, and point it at the address 192.168.1.254.
The device may ask you to set a new username and password. We recommend that you set both to "admi"n. The security here doesn't really matter very much and if you use the same username and password it will be easy to remember them later.
If it doesnt accept "admin" then try "admin1".
Now click next. The device will ask you to login. You just set the username and password so this should be easy.
Once you have logged in the device will start scanning the network and give you the message "Please wait while the WAN connection type is determined."
You can ignore this.
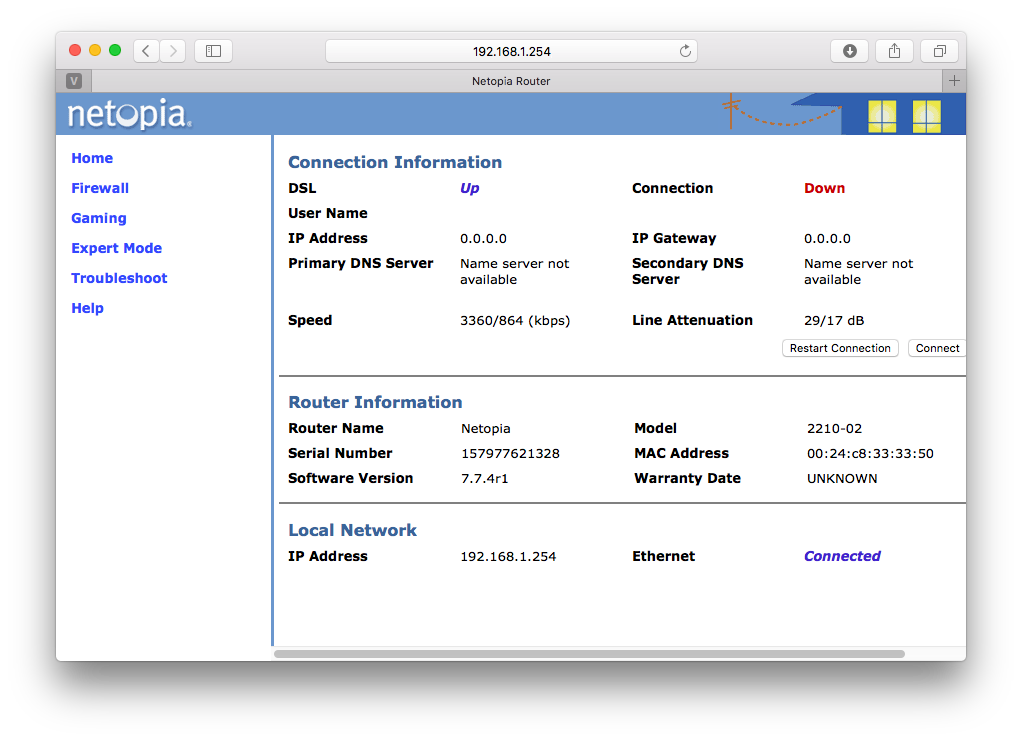
Click on "Start". You should see a status screen similar to this:
We can get a little more detail.
Click on "Start->Troubleshoot->Statistics->DSL". You should see something like this:
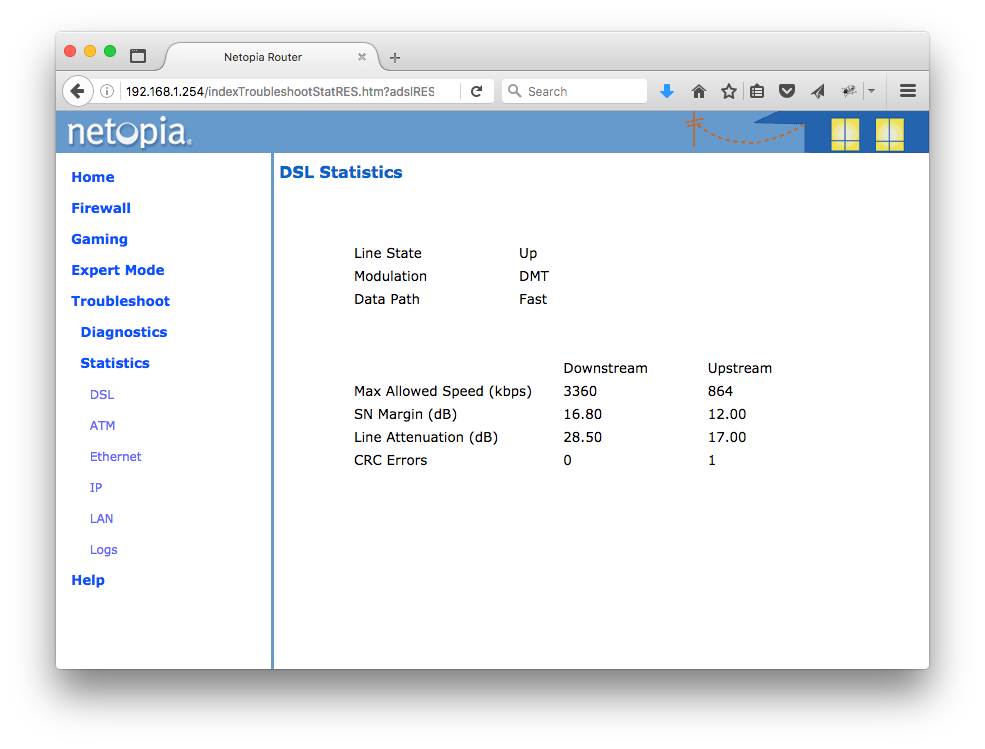
Here's what the numbers mean.
Line State: May be Up (connected) or Down (disconnected).
Modulation: Method of regulating the DSL signal. We don't worry about this.
DMT (Discrete MultiTone) allows connections to work better when certain radio transmitters are present. We don't care about this.
Data Path: Type of path used by the device's processor. Downstream and Upstream statistics
Max Allowed Speed (kbps): Your maximum speeds for downloading (receiving) and uploading (sending) data on the DSL line, in kilobits per second. This is the speed that the modem is connecting to the line at. You should be able to get 80-90% of this speed if everything is working well.
SN Margin (dB): Signal to noise margin, in decibels. Reflects the amount of unwanted "noise" on the DSL line.
Line Attenuation: Amount of reduction in signal strength on the DSL line, in decibels.
CRC Errors: Number of times data packets have had to be resent due to errors in transmission or reception.
Noise and Attenuation
These are the key numbers that we are really interested in.
SN Margin (AKA Signal to Noise Margin or Signal to Noise Ratio)
Relative strength of the DSL signal to Noise ratio. 6dB is generally the lowest dB manufactures specify in order for the modem to be able to synch. In some instances interleaving can help raise the noise margin to an acceptable level. Generally speaking, as overall bandwidth increases, your signal to noise ratio decreases. So a customer that upgrades from 1.5 to 6.0 service will typically see a corresponding decrease in the signal to noise ratio. The higher the number the better for this measurement.
- 6dB or below is bad and will experience no synch or intermittent synch problems
- 7dB-10dB is fair but does not leave much room for variances in conditions
- 11dB-20dB is good with no sync problems
- 20dB-28dB is excellent 29dB or above is outstanding
Line Attenuation
Measure of how much the signal has degraded between the DSLAM and the modem. Maximum signal loss recommendation is usually about 60dB. One of the biggest factors affecting line attenuation is distance from the DSLAM. Generally speaking, bigger distances mean higher attenuation. The lower the dB the better for this measurement.
- 20dB and below is outstanding
- 20dB-30dB is excellent
- 30dB-40dB is very good
- 40dB-50dB is good
- 50dB-60dB is poor and may experience connectivity issues
- 60dB or above is bad and will experience connectivity issues
Analysis of my line
My speed is 3360 kb. That's the speed I have.
My SN Margin is 16.8 (down) which is "good with no sync problems."
My line attenuation is 28.5 (down) which is "excellent".
Based on these numbers, my line would probably support a higher speed.
That's it. We have done our tests.
Problems - Resetting the modem
Only do this if you have tried logging in and it didn't work. If you can access the device without resetting it, this will save time. If the above steps worked, then DO NOT reset the device, it's a waste of time.
In the back of the modem is a small hole labelled "Reset". Inside there is a button that can only be pushed with a paperclip. This is to prevent you from accidentally resetting the unit to factory defaults.
Plug in the modem, make sure it is powered up, and then take your paperclip and push it in the hole, and hold it for a slow count to 20. The lights on the modem should flash a few times and the modem will be totally reset to factory default settings. If you are using the dsl, it will stop working. That's fine, but when we are done we will need to put it back the way it was.
Now go back and log into the router
Putting the modem back in "bridge mode".
Now we want to put the modem back as it was before.
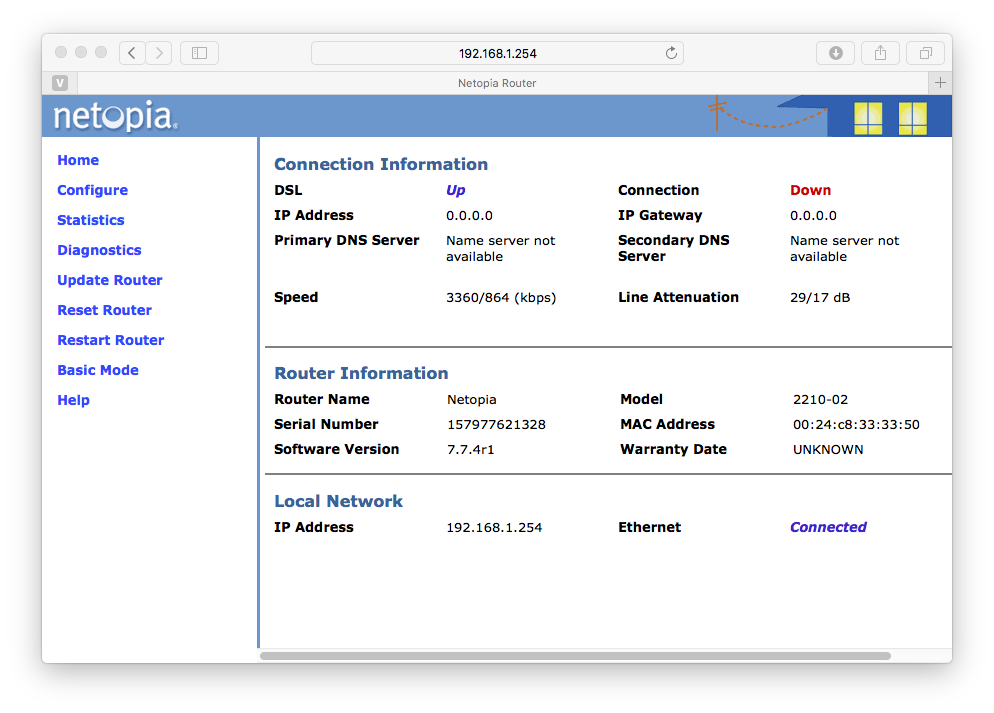
Select "Expert Mode". The device will object with "Changing some of the device settings in Expert Mode may cause your device to become unresponsive. Do you want to proceed?". Click "yes".
This gives us a bunch of new choices:
Select "Configure" and then "Connection" and you should see this:
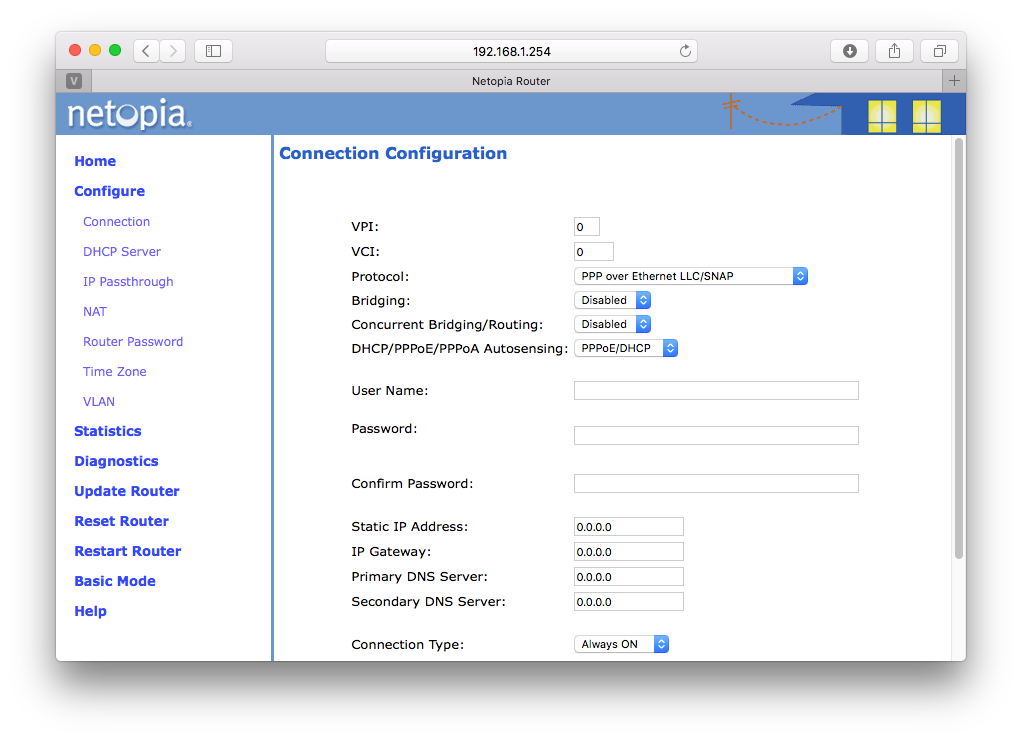
Note that this default configuration will not work. You must now configure this device as modem only ("Bridge Mode") or DHCP or PPPOE. Instructions for all three follow. Choose the one that matches your desired setup.
Configuring for Bridge Mode
Configuring for Bridge mode will turn off the internal route and put the modem in pass-thru mode. We will assume that you have a separate router that will take care of the connection. This is how we usually set things up.
Set VPI to 0, VCI to 35.
For Protocol, select "Bridged". Actually it says "RFC-1483 Bridged Ethernet LLC/SNAP". Fine.
For "Bridging", select "Enabled". This will make most of the other options go away.
For UPnP, uncheck.
If you have done it right, it will look like this:
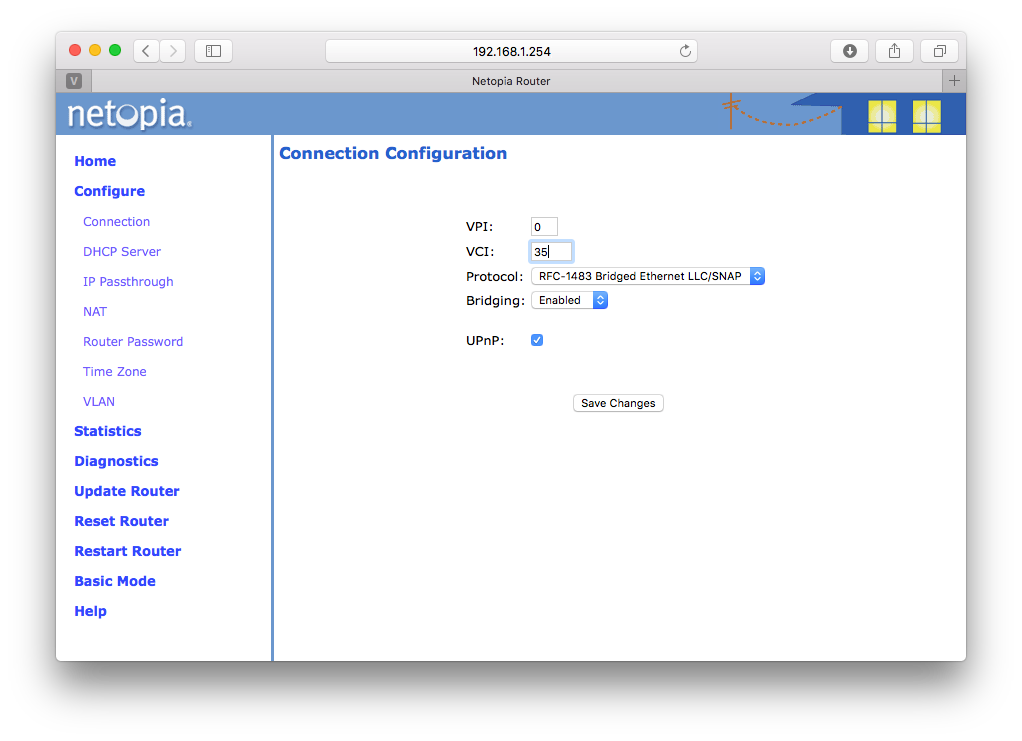
Click "Save Changes" and you should be all set.
Plug things back as they were before and you should be online.