


Netopia 2210 Modem
Netopia, one of the early innovators in Internet equipment, is now part of Motorola. They make excellent DSL modems.
Please note that we have instructions for several different models. If what you have doesn't look like what you see in these instructions, have a look at our other instructions for the "Motorola 2210-02" modem. It looks similar but the software is different.
DSL Lights - Check for DSL Signal
Before you can set up DSL you need a good DSL signal on the telephone line. Refer to the diagram below. We need a steady green light for dsl. If the light is blinking or off, then you don't have a good signal and nothing is going to work.
Here is a diagram of the lights:
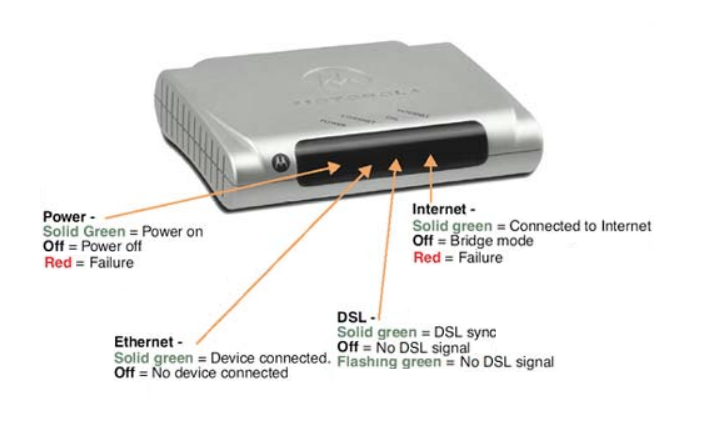
As per the diagram above, we want a SOLID GREEN light on the dsl light. It doesn't matter what the other lights are doing.
If you have a good dsl signal, then we can configure the modem. If you don't have a good dsl signal, and your turn on date has passed, be sure to let us know at Brand X Intenet so we can get it fixed. No amount of configuration will solve the problem if you don't have a good dsl signal.
Preconfigured Modem
At Brand X Internet we usually deliver the modems preconfigured. There should be a tag on the modem that says "ok". This means we openned the modem, configured it, and tested it. Configuring it again is usually a waste of time. These instructions will show you how to do it, but you may want to check other possible problems such as no dsl light. If you have no dsl light, or a blinking dsl light, and then you alter the modem configuration, you increase the number of problems you have. We strongly advise not to reconfigure the modem unless you are sure it is the problem. However, if you got the modem somewhere else, or it doesn't seem to be configured, then these instructions will allow you to reconfigure the modem in about two minutes. It's easy.
Connect to the Modem
Connect your computer to the modem using an ethernet cable. This is not a job for wifi. You need to use a cable.
Open a web browser and type the following URL address 192.168.1.254 and click on go.

You should see a page from the Netopia Modem (if it is new) or a login page (if it has been configured before).
Reset to Factory Defaults (Optional)
Usually this is not necessary, but if you can't log into the router this is the solution.
Please read the note above about preconfigured modems before resetting the modem to factory defaults.
The way to reset the modem to factory defaults is to stick a paperclip in the hole labelled "reset" on the back of the modem, while the modem is on. Wait 20 seconds then pull the paperclip out. Lights will flash and then it will come up in a minute or so. Go ahead with configuration.
Set Password
You may be prompted to create a Login Username and Passwor for the modem.
This is a waste of time but they force us to do it, so fine, let's do it.
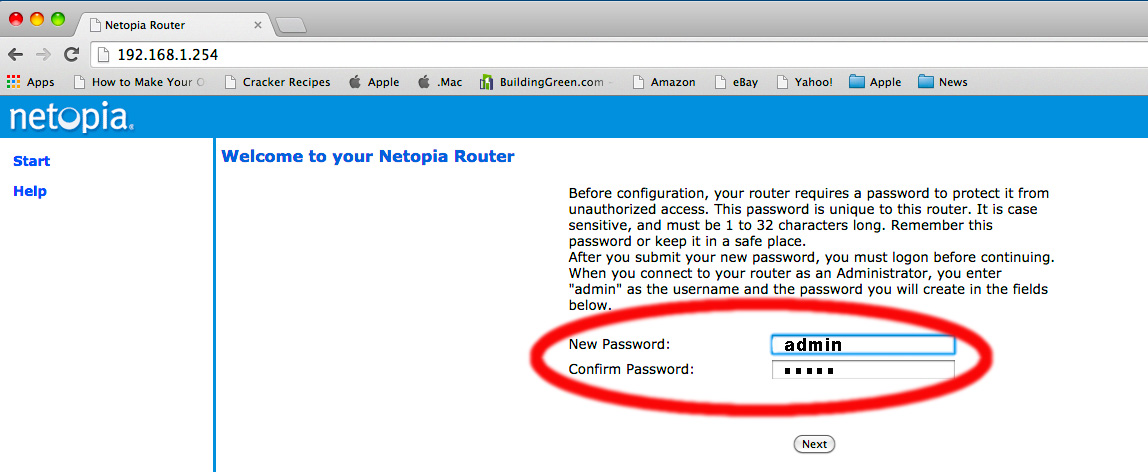
Use admin for both username and password. You could set them to something else but if you do it this way it's easy and then your password will match these instructions.
The modem will then ask you to login with your new username and password. Again, it's "admin" and "admin".
If this doesn't get you in, you may need to reset the modem to factory defaults.

Select "Expert Mode" from the menu at left.

Next Click on OK.

Next choose Configure from the Top Menu. Then Click on LAN.
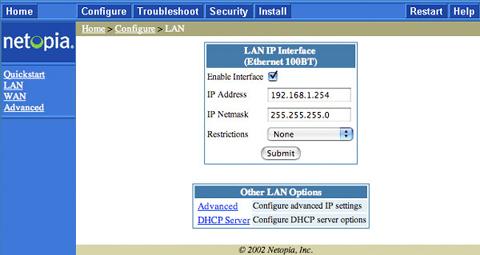
Then click on DHCP Server.

In the drop down box for Sever Mode select Off and click on Submit.
Next navigate back to Configure at the top of the screen, then click on Advanced.
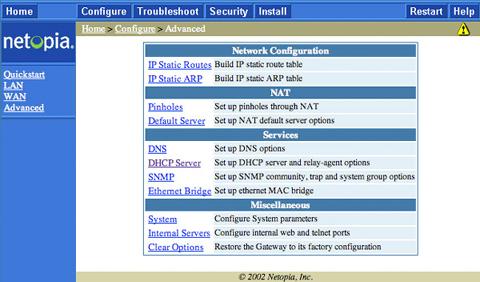
Click on Ethernet Bridge.
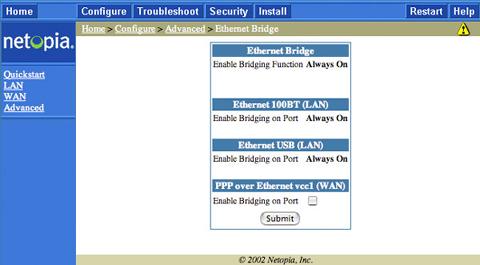
Place a Check into the box next to Enable Bridging on Port and then click Submit. You may then be prompted with a confirmation screen at which you will confirm the action.
Configure at the top of the screen and then select WAN
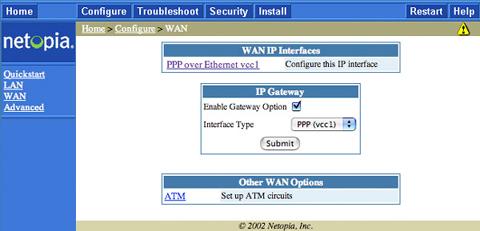
Click on PPP over Ethernet vcc1 under the WAN IP Interface.
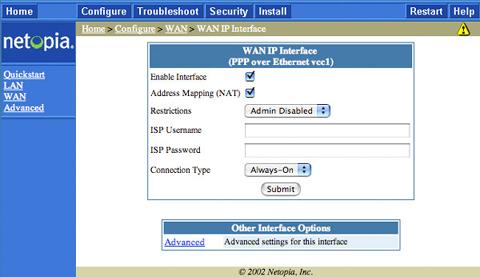
Remove the Check Mark from the Enable Interface screen and then click on Submit. Next Click on WAN once again and then remove the Check Mark from the box for Enable Gateway Option. Then click on Submit. Click on Configure again and then click on the Yellow Triangle with the exclamation point at the top right of the screen.
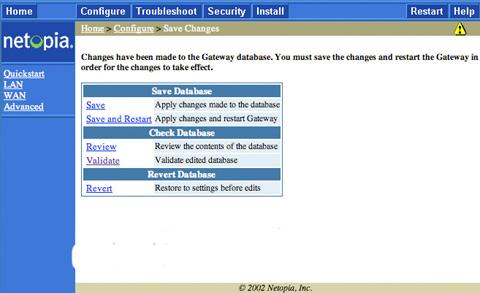
Click on Save and Restart.

The Netopia should now be Bridged. Next you will probably want to configure your Router to use PPPoE.