


Configuring Netgear Router
Netgear makes a variety of modems and routers. Some have wifi.
The WNR 1000 v3 is typical. It's a standalone router (no modem inside) with wifi capability and four ethernet plugs. These instructions were originally created with that model in mind, but others are very similar.
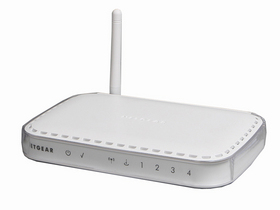
Netgear makes several other devices that are similar and may or may not have modems built in. If your device has two ethernet ports, it's a router. If it has an ethernet port and a telephone jack, it's a modem/router. If it has an antenna, then it has wifi capability.
Some Netgear modems can be configured as modems or routers. These instructions will show you how to disable the router so that the device can operate as a modem only.
If you want to configure the Netgear as a modem and disable the router, we have a separate instruction sheet for that.
Modem Lights
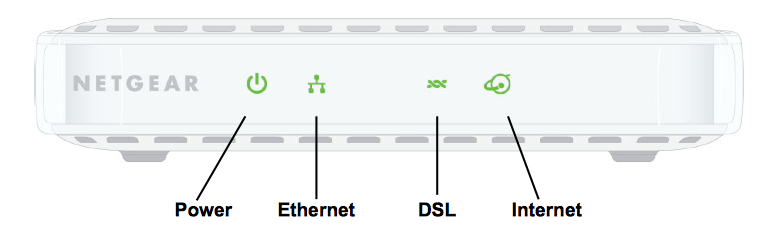
Power: You have power.
Ethernet: something is plugged into the ethernet jack. Some routers have more than one ethernet port; if so there should be a light for each one.
DSL: A solid green light means you have a DSL signal. Blinking means it is trying to sync up. Light off means no DSL. Note: this only applies to modem/router combo units.
Internet: If you have this device set up as a router, this means you have Internet working. If you have PPPOE this means that the username and password have been accepted.
Cabling
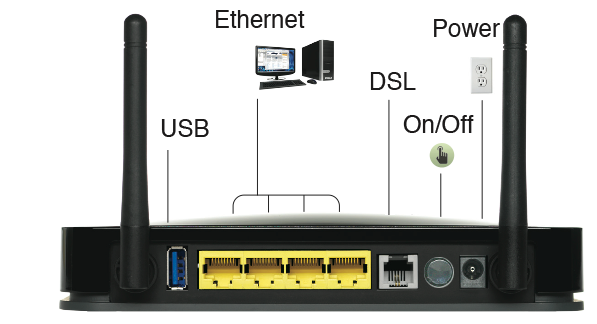
If you have a separate modem, connect your modem to a telephone line, then run an ethernet cable from the modem to the router.
Alternately if your router has a telephone jack, you can plug the telephone line straight into the router. That's what is shown in the picture above.
We also will need to connect a computer to the router for configuration purposes. This should be connected to one of the four ethernet jacks. You cannot configure this router via wifi.
Note: some wifi models also have a switch to turn the wifi off and on. This can cause problems if you don't know it's there and your router wifi is turned off!
Connecting to the Router
Now, connect to the router using the ip address 192.168.1.1 and the username "admin" and the password "password". These are the default values, assuming nobody has changed them.
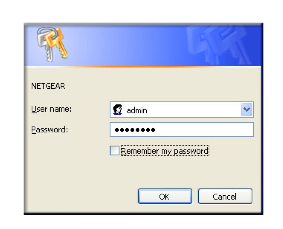
This should take you to the start screen for the router, which might look something like this:
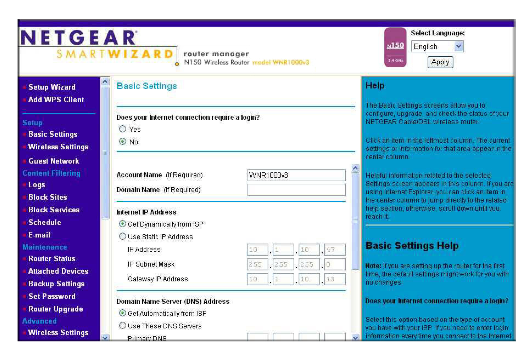
We are interested in the "Basic Settings", so click on that, and you should see the choices above.
Let's go through the questions one at a time.
The first question is "Does your Internet Connection require a login?"
If you have a DHCP or STATIC connection, the answer is no.
If you have PPPOE connection, with a username and password, the answer is yes.
Depending on how you answer that question, the wizard will take you to one of the following screens.
DHCP OR STATIC
If you have PPPOE then skip down below.
For either DHCP or Static connections, select "No Login Required" and you should see the screen below
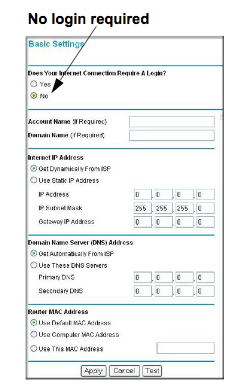
If you have DHCP then the account name is optional, domain name server leave blank, mac address is default. The only thing you need to do is put in that DHCP is active ("Get Dynamically From ISP").
For DHCP set the IP addres to "Get Dynamically".
For DHCP set the DNS servers to "Get Dynamically".
If you have Static, then fill in the IP Adress, Subnet Mask, Gateway, and DNS Numbers which you were given with your account.
PPPOE
If you have pppoe then you will have chose "Yes" for login required, and you should see this screen.
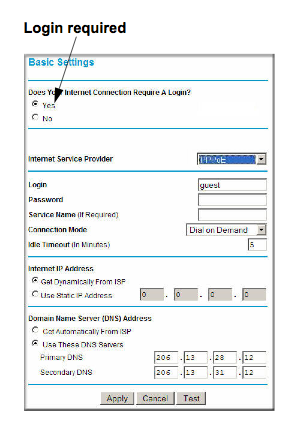
For PPPOE enter PPPOE for the Internet Service Provider, and add the Login (Username) and Password you were given with your account.
Set the IP addres to "Get Dynamically".
Set the DNS servers to "Get Dynamically".
All the various numbers should be blank as they will be filled in automatically via PPPOE.
You can hit "Test" to try the username and password.
Hit "Apply" to save your settings.
Saving Configuration
After you have entered the needed information for your type of account, hit "Apply" and the information to be saved. The router will restart. This takes one or two minutes. When this is done you should be online.