


Linksys/Cisco e1200 Router Setup for Brand X Internet
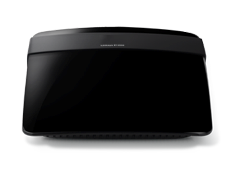
When Cisco purchased the Linksys they made some modifications to the setup software used by Linksys - primarily a bunch of warning screens when you try to go into manual configuration. The actual setup is about the same as older Linksys units. The e1200 router described below is typical of this type of router. Most others will be similar.
Check the Modem
The Linksys Router does not have a modem built it. Make sure your modem is up and working before you worry about the router. This means, make sure you have a good solid DSL light on the modem. If you don't have a good dsl signal, that problem has to be solved before you worry about setting up the router. No amount of router configuration will get your line going if the DSL light is blinking or black.
Before We Start...
You will need to know the connection type (dhcp or pppoe) and username and password (for pppoe). The following instructions will show you how to set up either type of connection.
Connect to the Router
You need one ethernet cable from the yellow port in the back of the router, to your modem. The color of the cables doesn't matter, but make sure you are plugged into the right port. There is only one yellow port, and that is the one for the modem.
Connect your laptop to one of the four blue ethernet ports on the router.
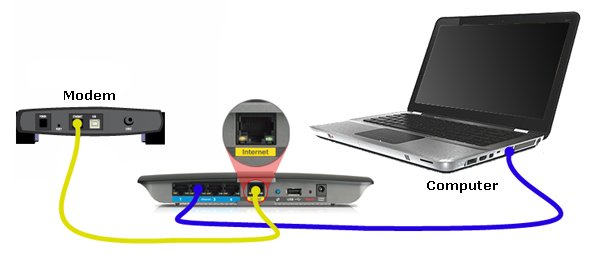
If you mix up the ports, configuration will not work.
Lights on the e1200
The router has lights that show if something is connected to the various ports.
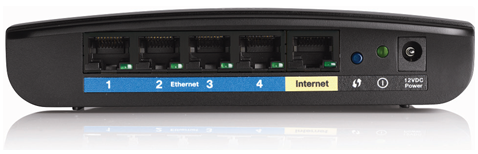
A green light is good. Blinking is ok. If one of the lights is dark, then you have a loose or bad ethernet cable. The lights will not tell you if you are online, you can either look at the interface or just try and get online.
Open the Router
Now, open up your browser to the ip address 192.168.1.1
(Just type the numbers into the address bar in Safari, Chrome, Firefox or Explorer.)
You should see something like the picture below. If this adress doesn't work, try 10.0.0.1 or 192.168.0.1. One of them should work.
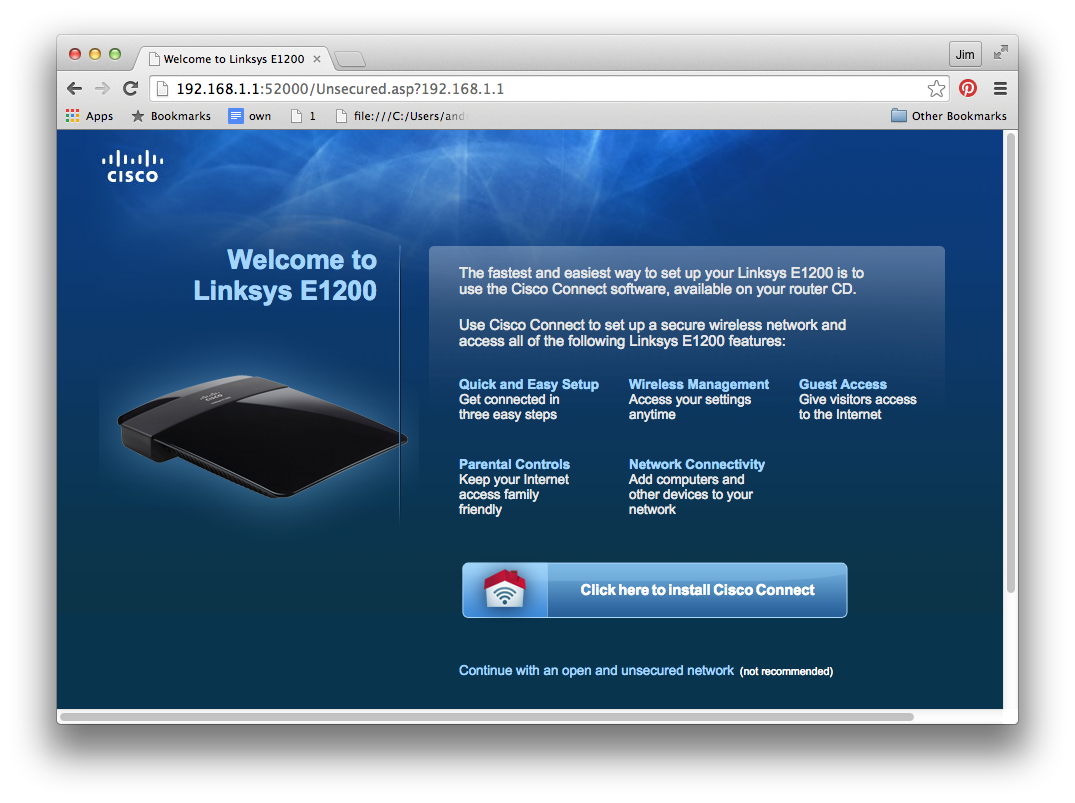
Do not install "Cisco Connect".
Instead, select "Continue with an open and unsecured network" so we can configure by hand.
The router will ask you to confirm that you really want to configure by hand. Say yes.
Passwords
If it asks you for a password try "admin" and no password, or "admin" and password = "admin".
Problems Connecting to the Router?
This step is only if you are having trouble connecting.
Make sure you have the ethernet cable in the right port and have a good connection to the computer. Refer to the diagram at the top of this page.
Do not try to connect via wifi. Turn wifi off on your computer, at least while we are configuring.
These instructions will assume that the router is set up to factory defaults. You might have to reset the router before you configure it, but be careful about doing this because this will wipe any configuration. Reset is done by putting a paperclip in the hole on the underside labeled "reset" and hold for 30 seconds. All the lights on the router will flash and the passwords and configuration will be set to defaults.
Now go back and try again to connect to the router.
DHCP Connection
If your connection type is PPPOE skip to the next section.
DHCP connections have no username and password. DHCP is the default setting for the router. Make sure that your router setup looks like the following screen. Hostname and Domain Name may be left blank. You should not need to change anything.
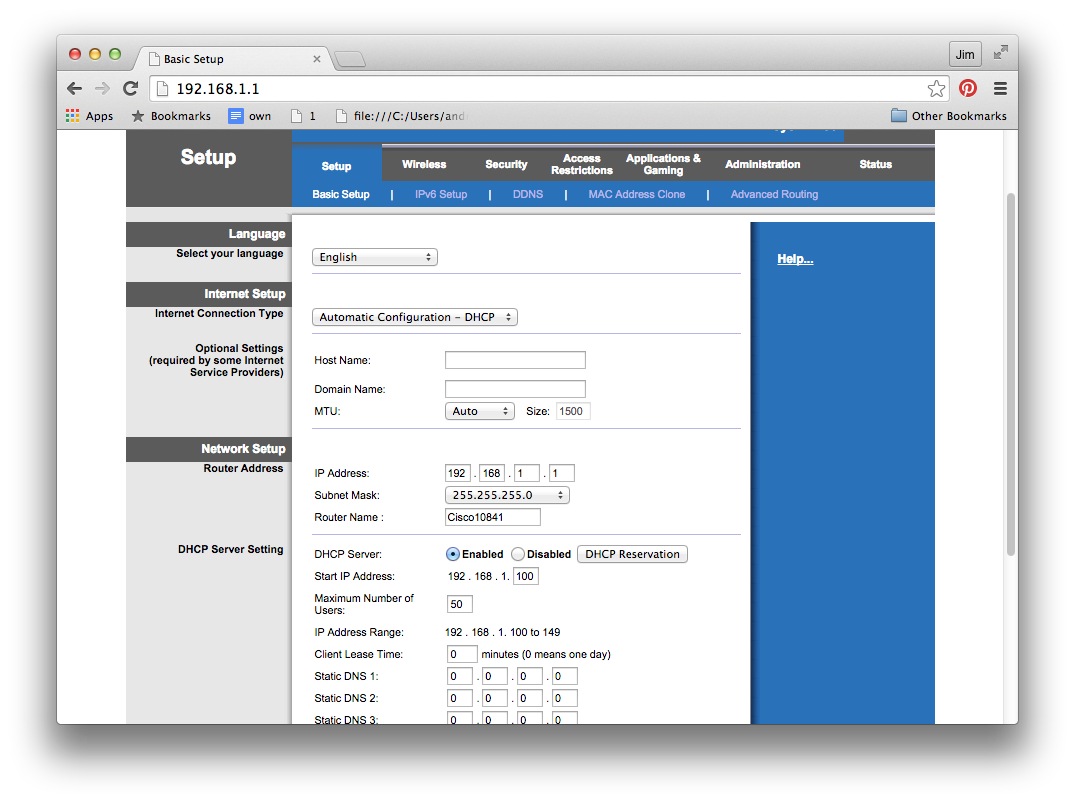
Click "Save Settings" at the bottom of the page to save your changes (if you made any).
Then skip thesection below and go directly to the section on WiFi setup.
PPPOE Connection
If your connection type is DHCP then skip to the next section.
PPPOE connections have a username and password. Set the connection type to PPPOE and add the username and password you were given. Note that the username for PPPOE is not the same as the password for Router Access or for WiFi. We have lots of passwords to keep track of so it's sort of confusing. Your username should be something like 3105551212@value.net. Refer to the example below:
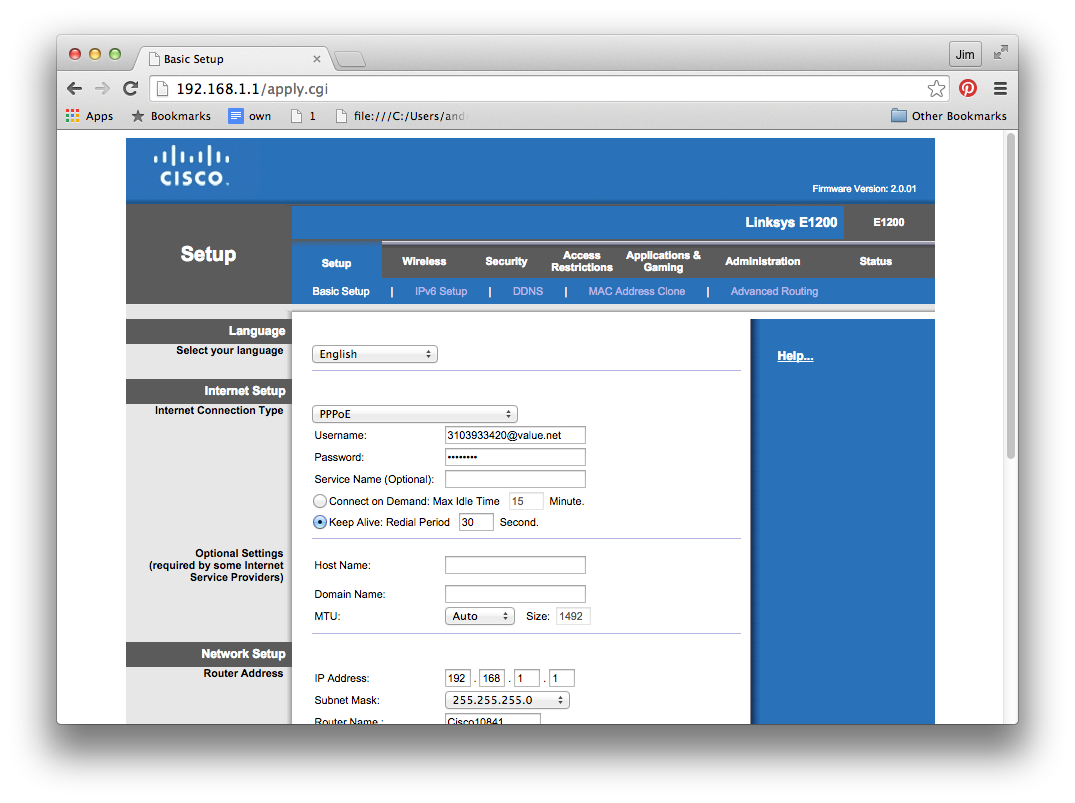
That's all we need to do to set up pppoe. You should ignore most of the other settings. Just go with the defaults.
Click "Save Settings" at the bottom of the page to save your changes.
WiFi Setup
We want to connect to the router via WiFI so we are going to set the SSID (hotspot name) and password.
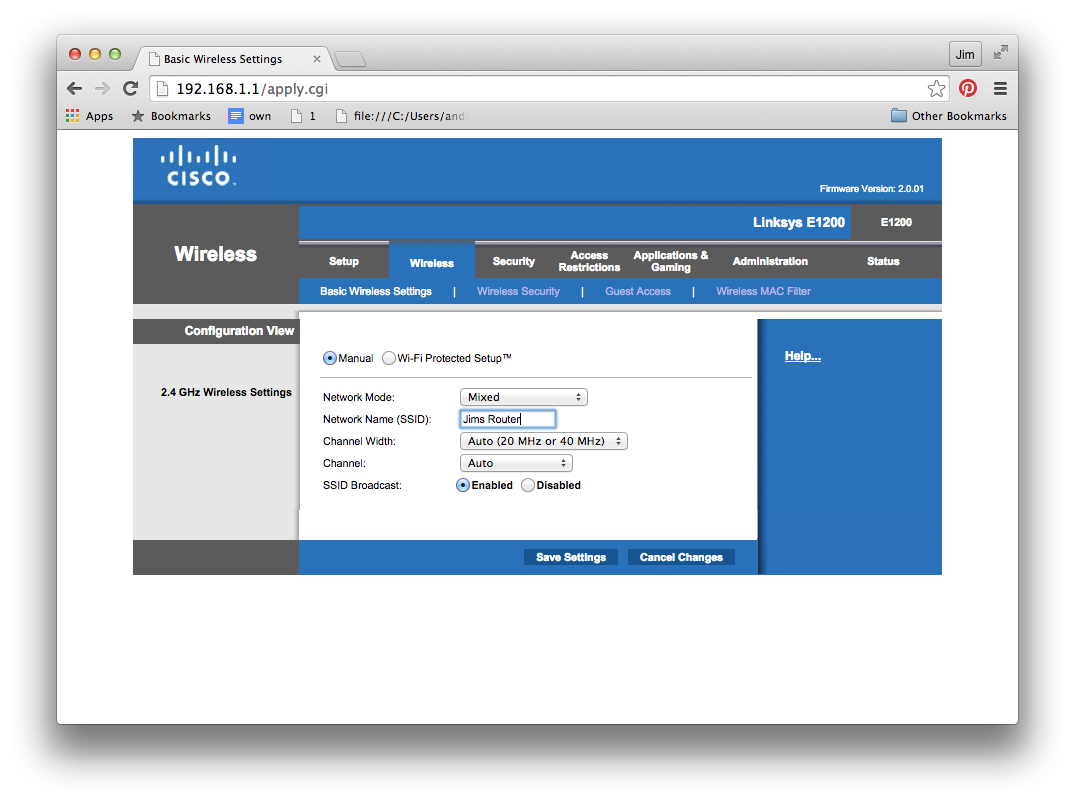
We are going to do MANUAL SETUP.
Select "Wireless" from the menu and then "Basic Wireless Settings". Choose a nice SSID and then hit "Save Settings".
Now click on "Wireless Security" in the menu and set a good password. That should look like this:
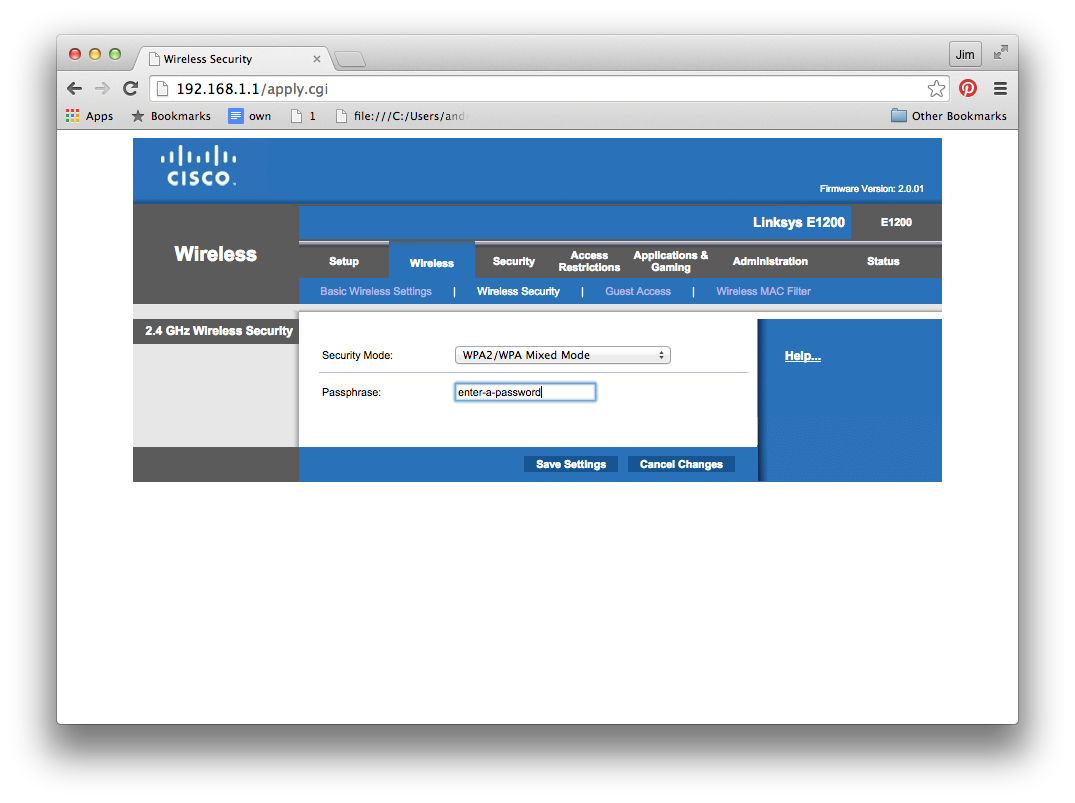
Click "Save Settings".
OK great, we are ready to go. If we have put the ethernet cables in the right ports and put in the right username and password, we should be online.
Check Status
There is a "status" choice in the menu which will show you if you are connected. It will look something like this:
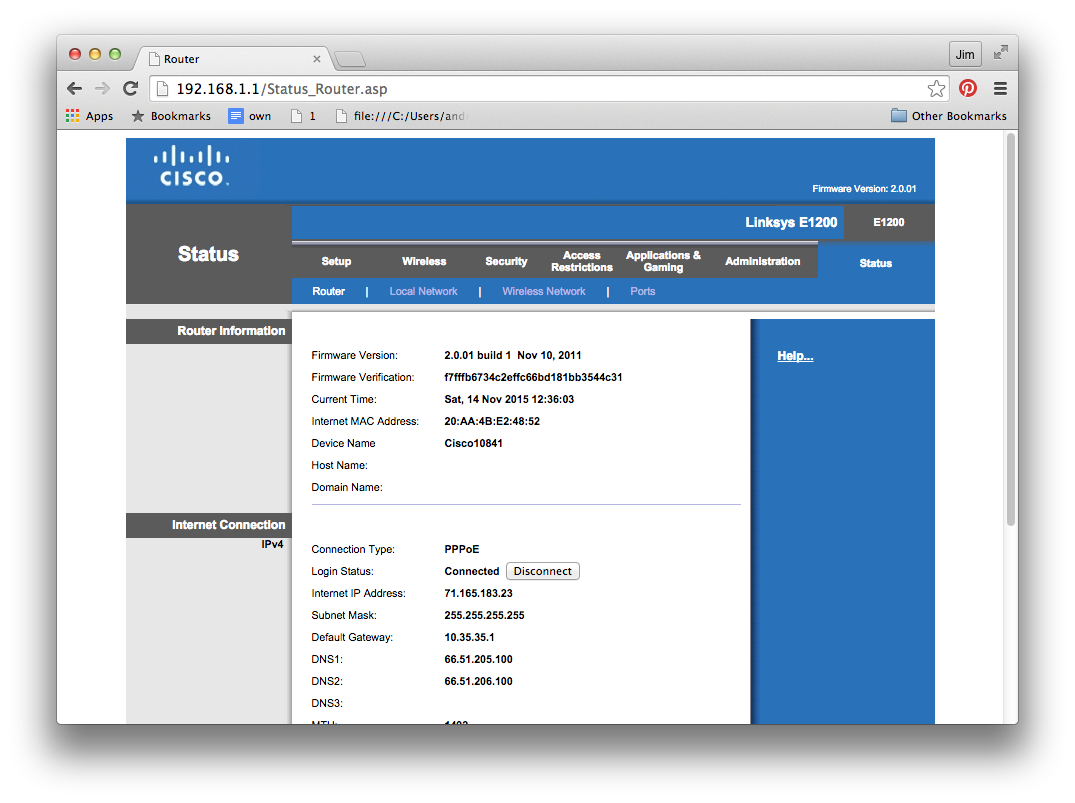
So, I am set up with PPPOE and I am connected. All looks good. We are done.