


Setting up Belkin Router for use on the Brand X Network
These instructions should help with a variety of Belkin routers.
Please note: Belkin recently purchased Linksys from Cisco. You may find instructions for new (rebranded) Belkin devices under Cisco or Linksys.
You can set up your router manually through the web-based setup page of the router.
Set up the Modem
We usually connect the Belkin Router to a Netgear or Westell Wirespeed modem. You should have a solid "Ready" light on this modem before you try to set up the router.
A blinking light on the modem, or no light at all, means that we don't have sync. It takes one or two minutes for the modem to sync up. If you don't have a good dsl signal then setting up the router isn't going to work no matter how hard you try.
Set up the Router
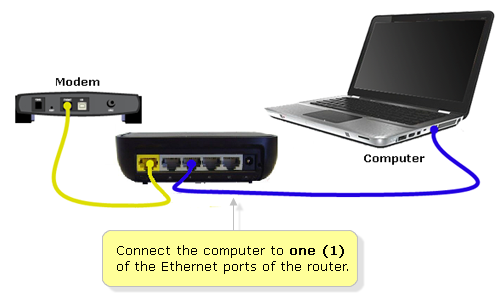
Plug the router in. Connect the modem to the WAN (Internet) port of the router. Connect the computer to one of the Ethernet ports of the router.
Open the Configuration Page
Your Belkin router has a web page inside that you can use for configuration.
Launch a web browser such as Explorer, Chrome or Firefox and enter “192.168.2.1” in the address bar.

The default IP address of Belkin routers is 192.168.2.1.
Login
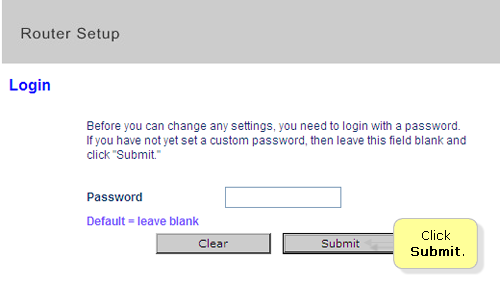
This is the first screen, called "Router Setup". Click "Login".

Leave the Password field blank and click Submit.
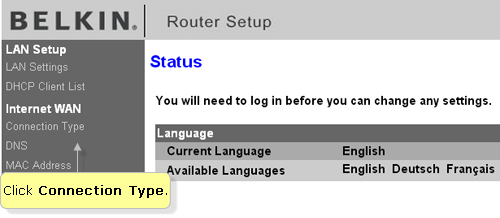
Set the Connection Type
Now we are in the configuration area. Under Internet WAN, click "Connection Type".
Select your Connection Type, then click Next, as shown below:
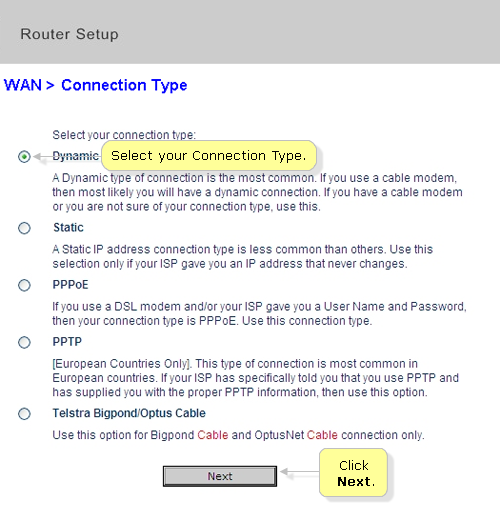
Your connection will probably be either DHCP (AT&T areas) or PPPOE (Verizon areas)
If your account is DHCP, then you are done, no further settings are required. Save/exit/restart and you should be online.
If you have a PPPOE conneciton, then you will need to fill out this page, which comes up when you hit "Next".
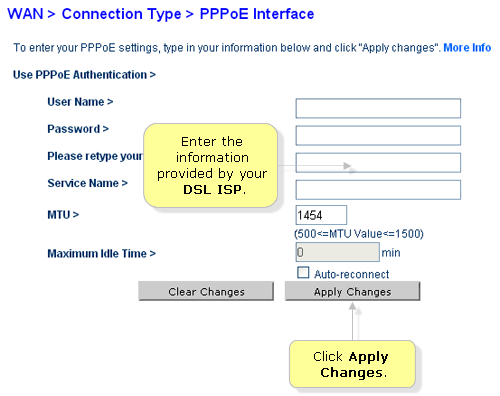
If you have a PPPOE connection you also need to give a username and password, which will be given to you by Brand X Internet. They will be something like
username=3105551212@value.net
Password = ghjkjhghj
These are just sample values, they probably won't work on your account.
For "Service Name" put "Brand X Internet"
Click "Apply Changes" and wait a minute or two. Be patient while the router resets.
You should now be able to connect to the Internet. To verify, Internet Status on the upper right corner should read Connected.
Static Addresses
If you have static addresses, read on. If you have DHCP or PPPOE, then skip this section.
If you have static addresses then you will have been given some address numbers to set up the configuration.
First, referring back to the previous step, we need to set the connection type as Static. That looks like this:
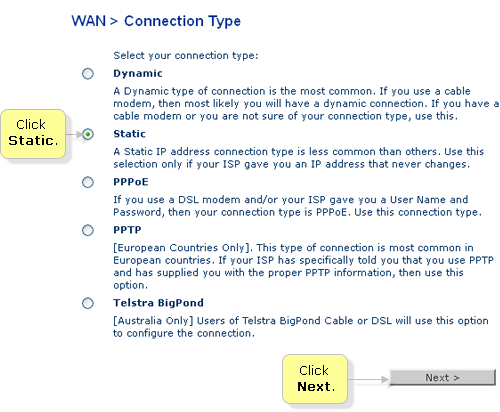
Then click "next".
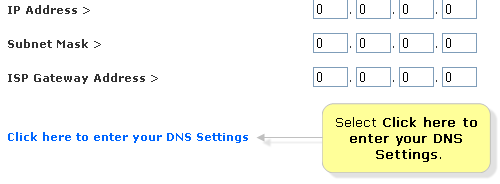
Enter the IP information the Brand X Internet people gave you.
The form looks like this:
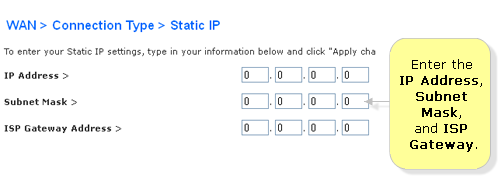
Move to the next page where we can enter the dns information.
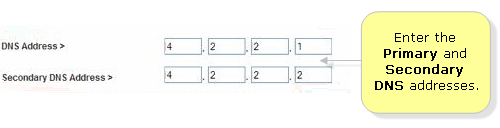
Here's where we put those numbers in. Ignore the numbers shown in the image - the values you should use are
8.8.8.8
8.8.4.4
So, put these numbers in the form.
When you have done it click "OK". The router will take a minute or two to restart, and if we have everything right, you should be online.
