


DSL Installation for Windows 8
Please note: if you are using a router, these instructions are not for you. Put the dsl settings on the router, and the computers should be set for dhcp or for wireless with dhcp.
In this document we will show you how to set up a DSL connection on your Windows 8 computer. It's generally similar to how you set up things in earlier versions of windows, but some people find it a little tricky to find the settings. One you are into control panels it's about the same as Windows 7 or even Windows XP.
Find the internet connection settings
There are several ways to get to the Internet settings in Windows 8
Alternately you may be able to find control panels in the Windows 8 menu. If so, then you will be fine. Just continue on to the Windows 7 instructins, they are the same.
On Windows 8 system, you can press the WIN and X keys together to access the Power User Menu, which has a shortcut for Control Panel.
Additionally in Windows 8.1, right-clicking on the Start button, including a press-and-hold or stylus right-click, will also bring it up.
If you are into the control panels, then setup is about the same as for Windows 7. See those instructions, which are attached below.
If you have trouble finding the control panels...
Here's another way to get to the setup section.
From your start screen find the button for the desktop.
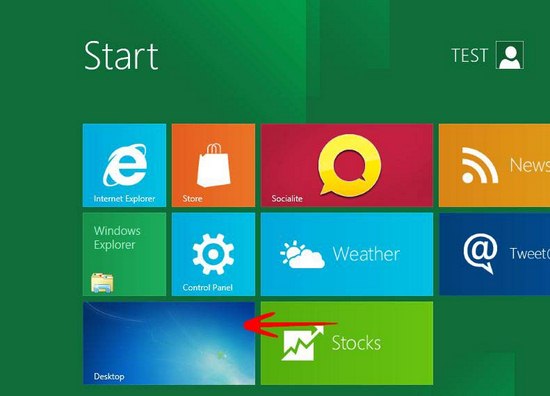
Selecting "Desktop" should take you to a screen that looks like the traditional windows desktop.

Now type Windows-r to bring up the run window. The windows key is a key on your keyboard. Hit it and r at the same time and you should get the little window that is show in the above diagram.
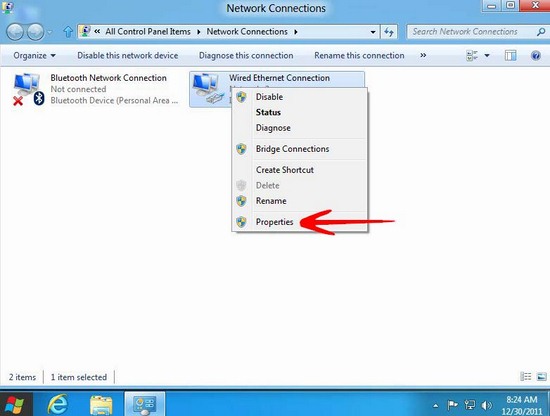
The program we want to run is NCPA.CPL. Enter this in the run dialog as shown above. This will take you to the "Network Connections" configuration screen.
From here on out the setup is the same as windows 7, which follows.
Windows 7 Setup
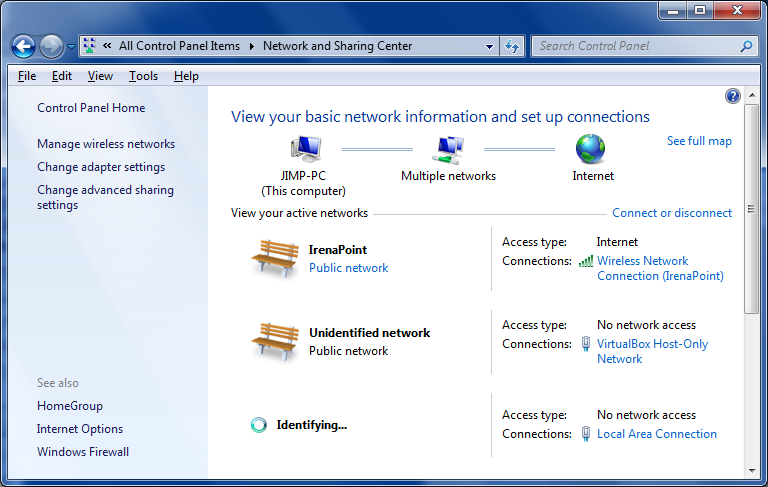
From the start buttong select "Control Panels" and then find the "Network and Sharing Center" and open it.
A window will open up with pictures of a couple of comptuers and various comments about network items that you have set up in the past.
If your connection is PPPOE go down below to the section on this subject. For Static or DHCP continue with this section.
Locate an item called "Local Area Connection" and click on it. In the illustration above it's in the lower right corner.
This will take you to the "Local Area Conenction Status" window.
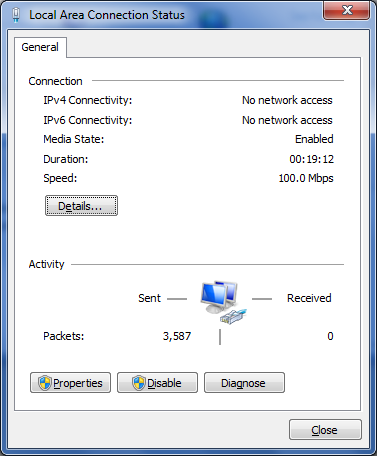
Select "Properties", found in the lower left.
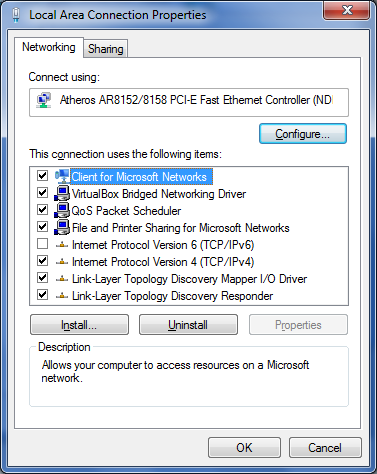
Select "Internet Protocol Version 4 (TCP/IP)" and then click "Properties". This will take you to the properties window
Choose your connection type
At this point you must decide which kind of connection you have. The possibilities are PPPOE, DHCP and STATIC. Your next step in configuring will depend upon which connection type you have been assigned.
Note: if you are using a router, then set the computer for DHCP.
DHCP
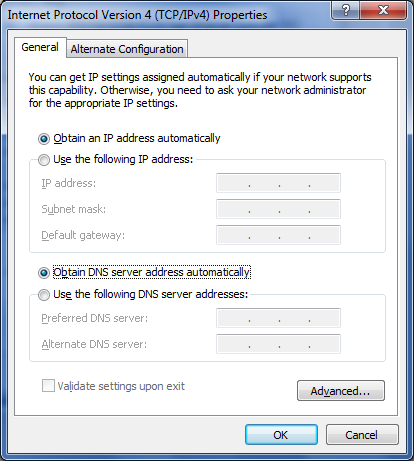
For a DHCP connection set everything as shown in the diagram below.
Specifically: "Obtain an IP adress automatically" and "Obtain DNS server address automatically" should be checked. Everything else should be left blank.
Click ok to save your settings and exit. You should be online.
Static
For a Static connection you must put all of the ip address information into this window
You have to get the numbers from Brand X Internet. When you are ready your setup should look something similar to this:
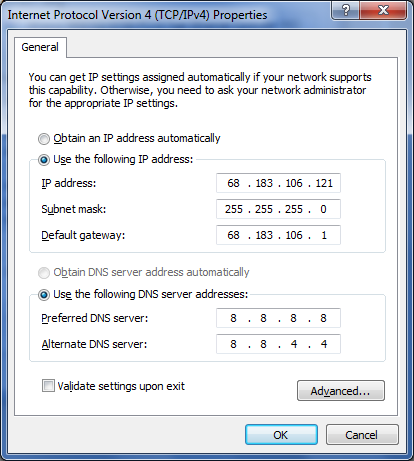
Note that "Use the following IP address" and "Use the following DNS server addresses" must be selected so that you can enter these numbers.
PPPOE
PPPOE settings are very similar to DHCP but you have a username and password for the connection. To set this up we will need to go back to the network control panel, as described below.
The username and password you have to get from Brand X Internet, you are not goint to be able to guess them, though they should look a little bit similar to our examples.
To create a PPPoE client connection: Click Start, click Control Panel, and then double-click Network and Internet Connections.
Click Network Connections, and then click Create a new connection in the Network Tasks pane. This takes you to the "Set up a Connection or Network" page.
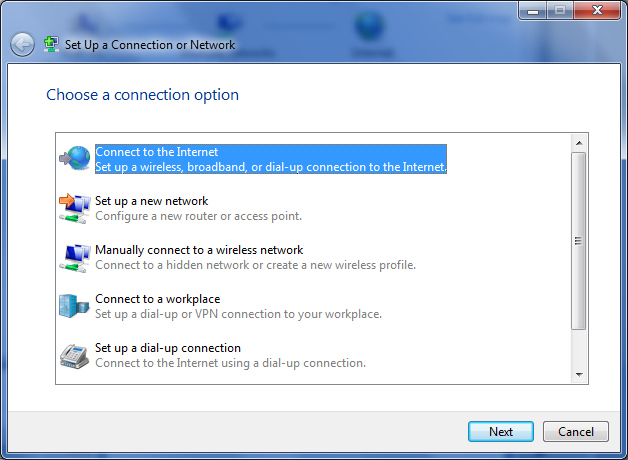
The computer will ask you to "Choose a connection option".
Click Connect to the Internet, and then click Next.
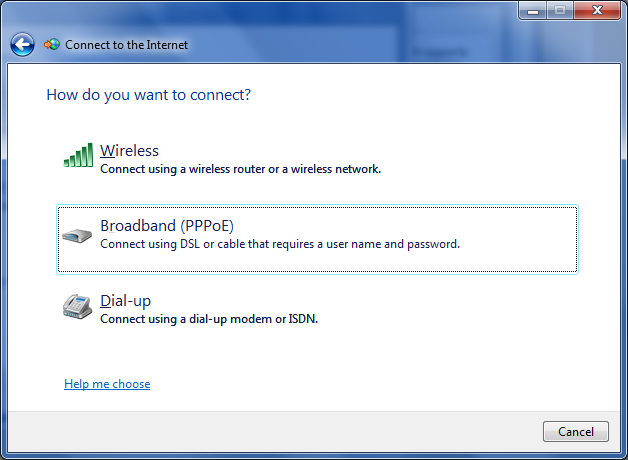
The computer will ask you "How do you want to connect?"
Select "Broadband PPPOE".
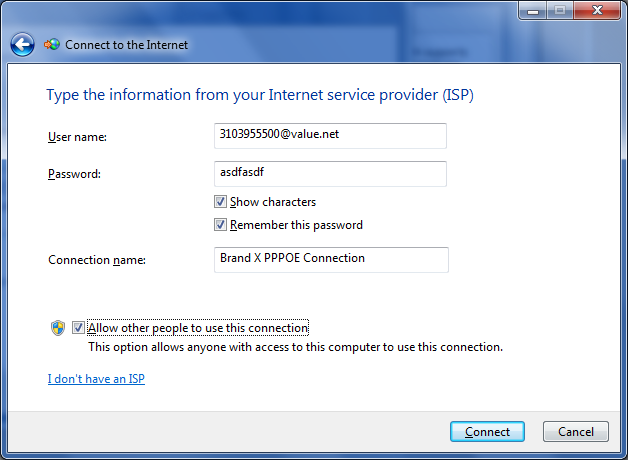
This will take you to a window where you can enter your PPPOE username and password.
Enter the username and password similar to what you see in the following picture.
Note that the username and password shown are examples, but you will need to get your own username and password.
When you are ready it should look like this.
Click "Connect" and you should be online in a moment.
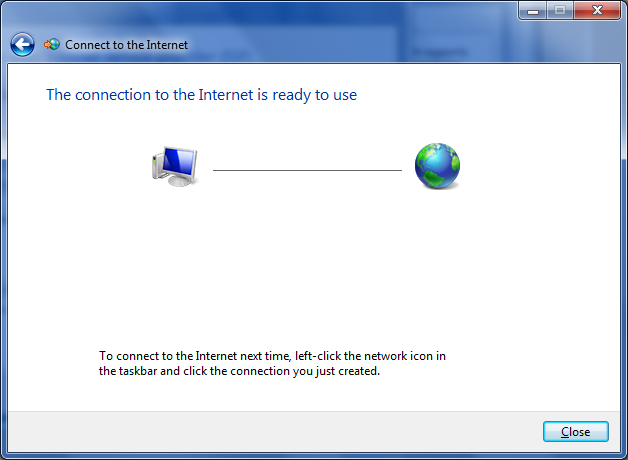
To connect to the Internet next time, left click the newtork icon in th taskbar and click the connection you just created.
Conclusion
We have shown three different ways to configure an Internet Connection.
With any of these, please make sure that your connection itself is live, otherwise you will get very frustrated. The best way to check this is to connect a modem and look for a ready light.
If you have a ready light and still can't get online, go back and check your settings. For DHCP there isn't much to check. For PPPOE check the username and password and make sure "@value.net" is included in the username. For Static you just have to check all of the numbers carefully.
If you have questions, we are here to help.
Brand X Internet
email support@brandx.net
telephone 310 395 5500